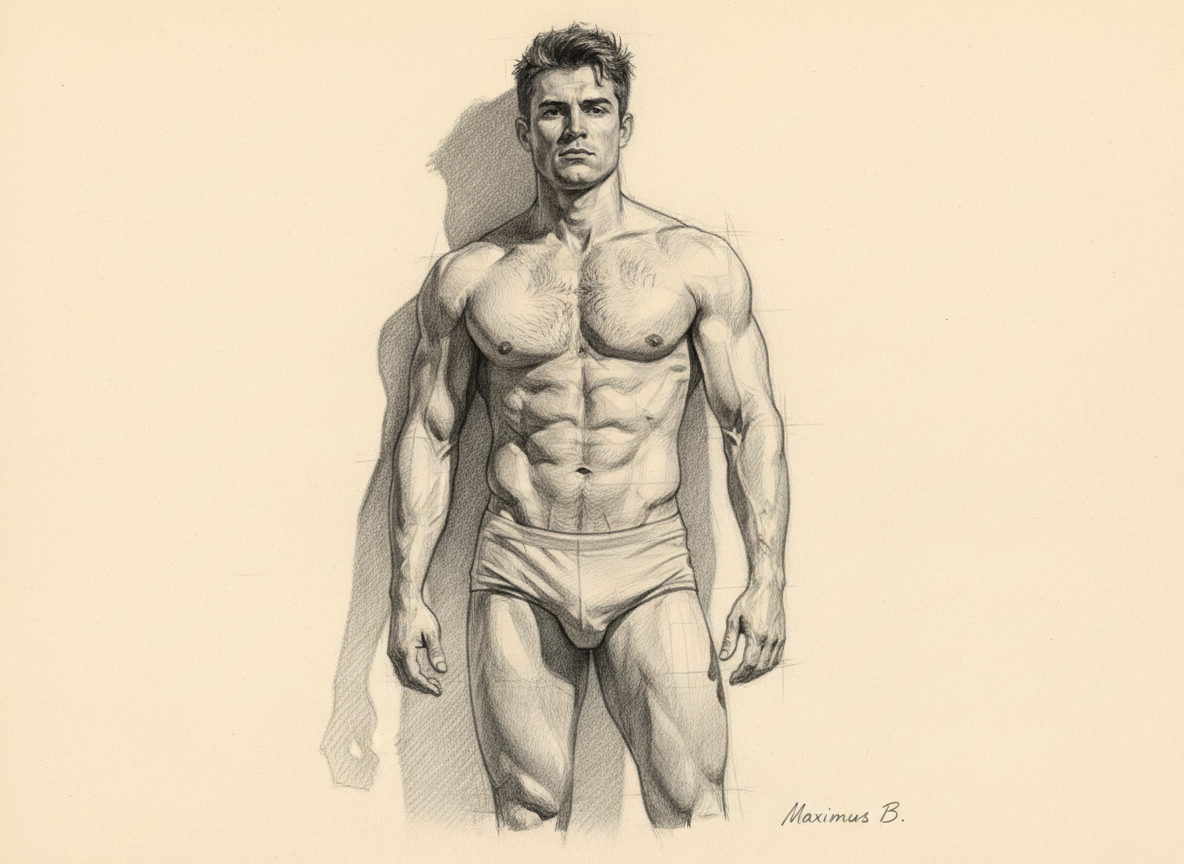
Light direction in graphite figure drawing is not a stylistic choice — it is a structural decision. The moment you commit to where the light comes from, every shadow, every highlight, and every halftone on the figure has a reason. Without that commitment, shading becomes guesswork, and the figure stays flat no matter how carefully you render the anatomy.
This is one of the most common problems I see in figure drawings at every level: the artist has studied anatomy, they understand the muscles, but the drawing still looks unconvincing. The reason is almost always the same — the light has no direction. Model age range (internal): 26–42.
Light Direction in Graphite Figure Drawing: Decide Before You Draw
Before you make a single tonal mark, decide on your light source. Not approximately — precisely. Is it coming from the upper left? Upper right? Directly overhead? From the side at shoulder height?
Write it down if you need to. Draw a small arrow in the corner of your page. Whatever it takes to make the decision concrete, do it. Because once you begin shading, every decision that follows must be consistent with that single choice.
The most common light direction in classical atelier drawing is upper left, at roughly 45 degrees. This is not arbitrary — it produces clear, readable shadows on most poses, and it matches the traditional lighting of academic studios. But any consistent direction works. What does not work is changing your mind halfway through.
The Two Families: Light and Shadow
Once you have committed to a light direction, your first task is to divide the figure into two families: the light family and the shadow family.
Everything that faces the light source belongs to the light family. Everything that turns away from it belongs to the shadow family. This is a binary decision — there is no middle ground at this stage. You are not shading yet. You are mapping.
In practice, this means squinting at your reference until the detail disappears and only the large light and dark shapes remain. Those shapes are your shadow family. Draw their boundaries lightly with your HB pencil. This boundary line — the edge where light becomes shadow — is the most important line in the drawing. It defines the form.
How Light Direction Changes the Figure
The same pose looks entirely different under different light directions. This is not just an aesthetic observation — it is anatomically significant.
- Side lighting (from the left or right) produces the clearest separation of light and shadow on the torso. The core shadow runs down the lateral edge of the ribcage, and the front plane of the chest is either fully lit or fully in shadow. This is the most useful lighting for learning anatomy, because it reveals the three-dimensional structure most clearly.
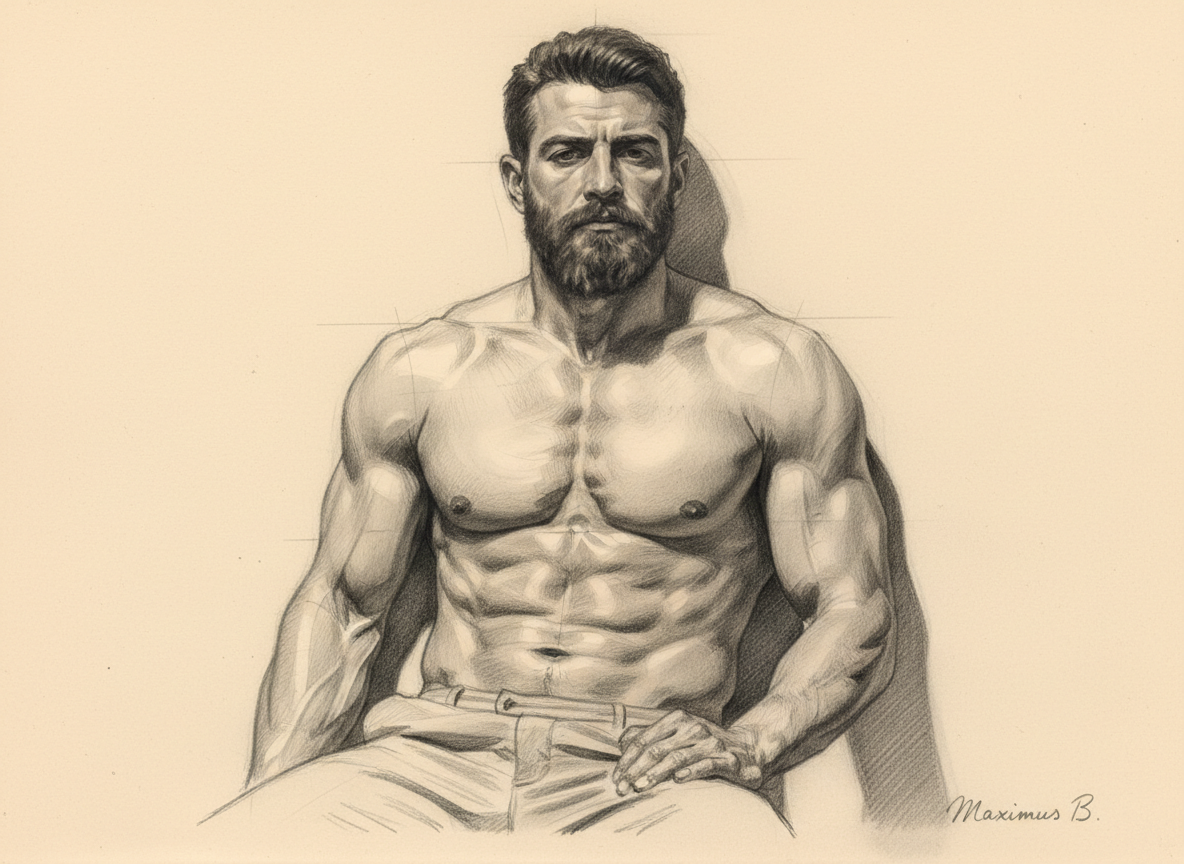
- Overhead lighting (from above) creates strong shadows under the pectorals, under the chin, and in the eye sockets. The top planes of the shoulders and head are brightly lit. This lighting is dramatic and tends to flatten the lateral structure of the torso.
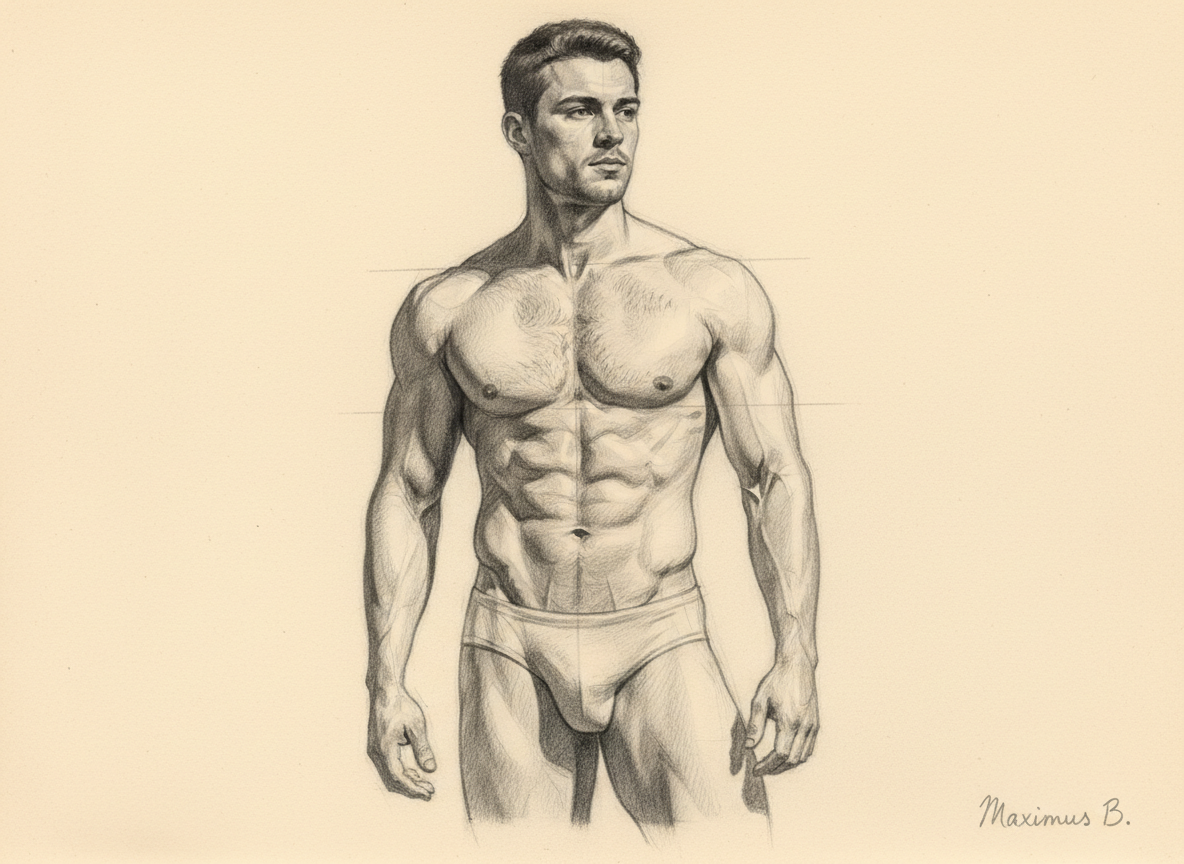
- Three-quarter lighting (from above and to one side) is the most common in classical figure drawing. It produces a clear shadow on one side of the face and torso while keeping the other side in light. The Rembrandt lighting pattern — a small triangle of light on the shadow side of the face — is a variant of this.
- Rim lighting (from behind) silhouettes the figure and creates a bright edge along the contour. The front of the figure is in shadow, with reflected light providing the only internal detail. This is the most challenging lighting to render convincingly.
Mapping Shadow Shapes Before Shading
The most important habit you can develop for light direction is this: map your shadow shapes before you begin shading.
After establishing your light direction and dividing the figure into light and shadow families, spend five minutes lightly outlining the shadow boundaries on every major form — the torso, the arms, the legs, the head. These outlines are not contour lines. They are the edges where the surface turns away from the light.
Once these boundaries are established, fill the shadow areas with a flat, uniform mid-tone using your 2B pencil. Do not differentiate within the shadow yet — just separate light from shadow across the entire figure. This single step will make your drawing look more three-dimensional than most artists achieve in an hour of detailed shading.
For the deeper tonal structure that builds on this foundation, see: Core Shadow and Reflected Light in Graphite Figure Drawing.
Directional Shading: Let Strokes Follow the Form
Once your shadow masses are established, the quality of your shading depends on one thing: stroke direction. Your graphite strokes must follow the form of the surface you are shading, not run randomly across it.
On the cylindrical form of the upper arm, strokes curve around the cylinder. On the flat front plane of the sternum, they run straight. On the rounded deltoid, they follow the curve of the muscle. This discipline — which takes time to develop — is what makes the difference between shading that looks like texture and shading that describes form.
For a focused daily practice on this principle, read: Graphite Stroke Direction and Anatomy.
A Practical Light Direction Drill (15 Minutes)
- Choose a reference with clear, single-source lighting. Decide the direction and write it down.
- Draw the gesture and block in the major masses — ribcage, pelvis, limbs.
- Map the shadow boundaries on every major form. Use light HB lines.
- Fill all shadow areas with a flat 2B mid-tone. Do not shade the light areas at all.
- Step back. Does the figure feel three-dimensional? If yes, proceed to refine. If no, check your shadow boundaries — they are probably inconsistent with your stated light direction.
Repeat this drill three times with the same reference but different stated light directions. You will see immediately how dramatically the same pose changes under different lighting — and you will understand why the decision must be made before the first tonal mark.
Supporting Visual Studies (Full Body)
Two supporting studies for today's topic. Each is a full-body graphite study exploring light direction under different conditions — different models, poses, and light sources. Models read adult 26–42.
The Complete Path
Light direction is not a finishing touch. It is a structural decision that shapes every mark you make from the first gesture line to the final dark accent. When you commit to it early and map your shadow families before shading, the figure gains a solidity that no amount of anatomical detail can produce on its own.
Light and shadow are covered in depth across multiple stages of Mastering the Male Figure, where each lesson builds the tonal foundation before adding anatomical refinement. If you keep one principle close, keep this one: decide the light direction before you draw the first shadow.